Testing the waters
There are plenty of tools that allow you to automatically generate personalized images at scale as of now (and we will prepare a separate post about them soon). Yet, back in 2017, we couldn’t find the right solution to do what we needed out of the box.
So, instead of investing in the first available software that remotely fits our needs or wasting our engineering resources to build a new tool from scratch, we’ve decided to start with a quick A/B test (just to prove our assumption).
We put together 2 sequences based on the same templates that had only one difference: the emails in the 1st sequence contained a personalized image. You read that right – we created 500 personalized images manually just to see if this tactic would work.
The results came quickly: the sequence containing personalized images generated 2X more warm replies!
After our excitement cooled down, we started thinking about how we could replicate this approach at scale.
First of all, we asked our designers to improve our image templates and make them more appealing and professional-looking.
Secondly, we conducted market research and even found a few tools that could help us automatically generate the required images. Sadly, they still didn’t have all the features we needed.
Despite being an SDR, I decided to write a simple script that could automate the process. A few weeks of trial and error later, our very own “personalized images at scale engine” was ready!
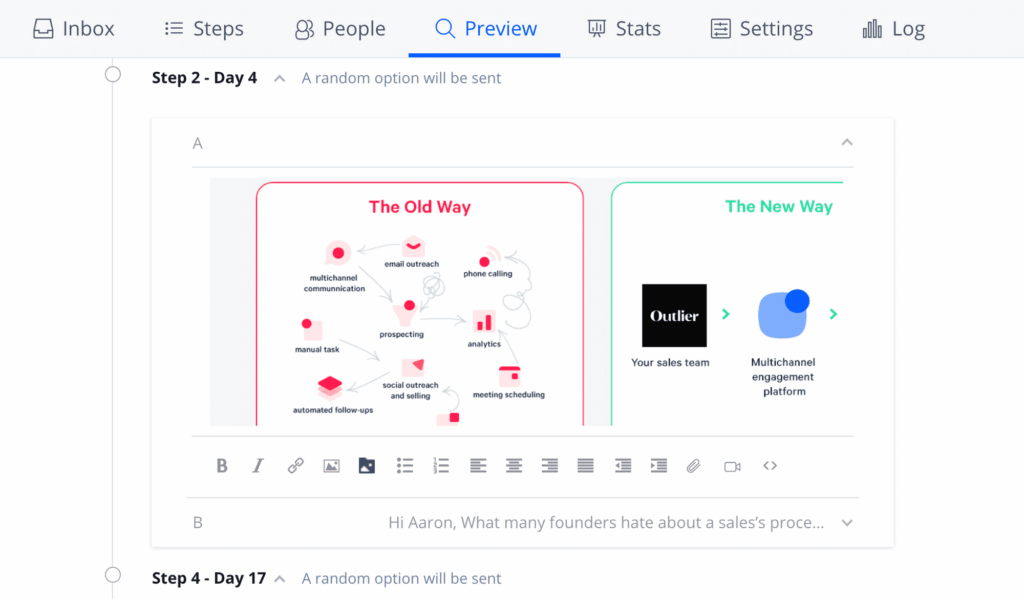
Here is one of such image templates we’ve been using at Reply:
To find out how we made that work, read on.
How to create personalized images at scale
Let’s use the image above to build your own image personalization project.
As you can see, the only variable you can personalize here is the Company’s logo.
To start with, talk to your SDRs about the image design, variables you could use for personalization, where and how you could add those images, etc. The more ideas you have the better. ⚡️
Next, you should also talk to your software engineers and dev ops to discuss the technical side of the project – data gathering, image generation, image storage, etc.
For our example, we will use Google Spreadsheets as a starting point – mostly because our SDRs rely on it for list building and initial data research, cleaning, and enrichment.

As mentioned above, we have built our own custom solution to both meet our current needs and be able to adjust to the new requirements if we want to modify an image blueprint. And here’s how it works:
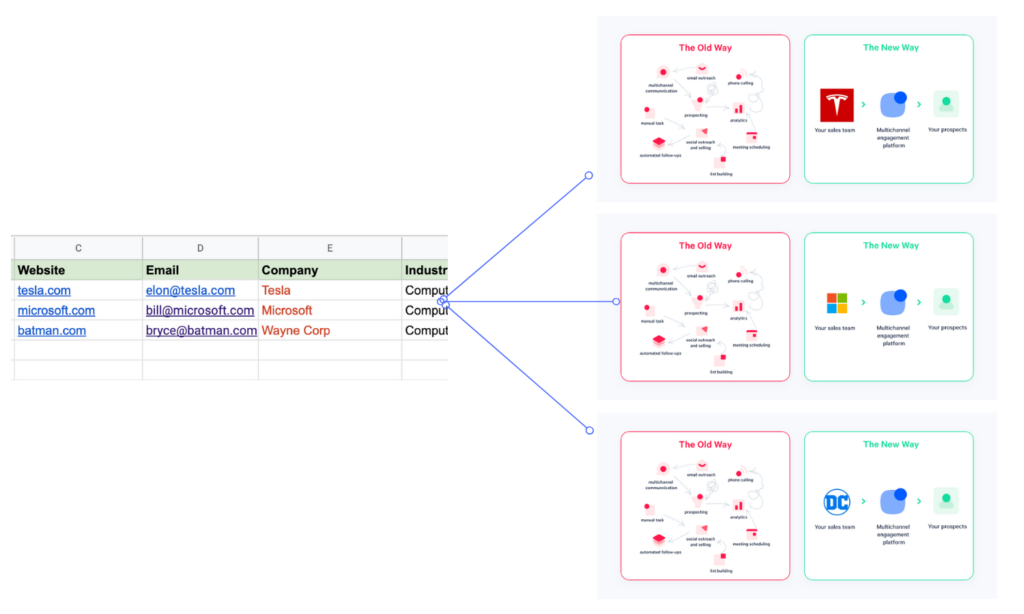
Once the initial research is finished, the app connects to the Google Spreadsheet with the accumulated data, goes through the 1st row to get column names, and matches them with variables we would use to personalize the image.
For instance, if we want to use the “Company Name” variable, the script will find a column “Company” and dynamically place that data on every single image we want to personalize.
When all columns are matched, it proceeds to the 2nd row in the spreadsheet to create an actual personalized image. In our case, here’s what happens next:
- The app starts drawing an image (its dimensions, static elements like icons, borders, colors, etc.)
- The app grabs the data from your Google Spreadsheet to keep drawing an image. At this stage, we need the info like Company Name, Industry, First Name, Email, etc. – any variable you can think of to make your image more personal.
- The app grabs the Company’s URL address and sends an API call to the Clearbit’s Logo API to get the company’s logo icon and adds it to the image. (For other projects we’ve also used some 3rd party libraries to identify the logo’s primary colors and use them as image background color, etc.)
- Now, we will need to save our image somewhere. You can use Google, Amazon, your own web hosting, or any other 3rd party services to save that image physically, just make sure the image will be accessible by URL in a browser.
- Once the image is saved to your cloud storage, you will get a unique URL that we save back in the Spreadsheet (see a column called “Image URL” on the image above)
Here’s how the workflow looks like in a nutshell:

After you complete these steps, which means that your personalized image is ready, the app proceeds to the 3rd row, then the 4th row, and so on (unless there is an empty row in the spreadsheet).
When the whole list is processed, you can download a CSV file and upload it to Reply (or any other SEP you’re using) and contact prospects using personalized emails at scale.
More on that below.


![How to Write Your Perfect LinkedIn Connection Message [With 15+ Templates]](https://reply.io/wp-content/uploads/linkedin.messages-1024x538.jpg "How to Write Your Perfect LinkedIn Connection Message [With 15+ Templates]")