
Just because Reply 3.0 has launched (to great success) doesn’t mean it’s time to rest on our laurels. Our team is still hard at work designing new features and improving old ones all of the time. The latest upgrade in our development pipeline is finally ready to be unveiled: our new and improved SalesForce integration!
Please contact our support team in order to enable the new Salesforce integration for your Reply account.
Don’t have Reply account yet?
Use our easy to understand step-by-step workflow to create rule sets to flow leads and contacts between Reply and SalesForce on the fly and take advantage of our ever growing mapping list to bring in even more information than ever before. But enough with the hype, let’s dive in and show you what it’s all about.
Integration Set-Up Guide

Right off the bat you’ll notice that things are looking a little different (read: prettier). With our updated design we figured that we should extend that outlook to all branches of our platform. Everything is sleeker and more obviously readable.
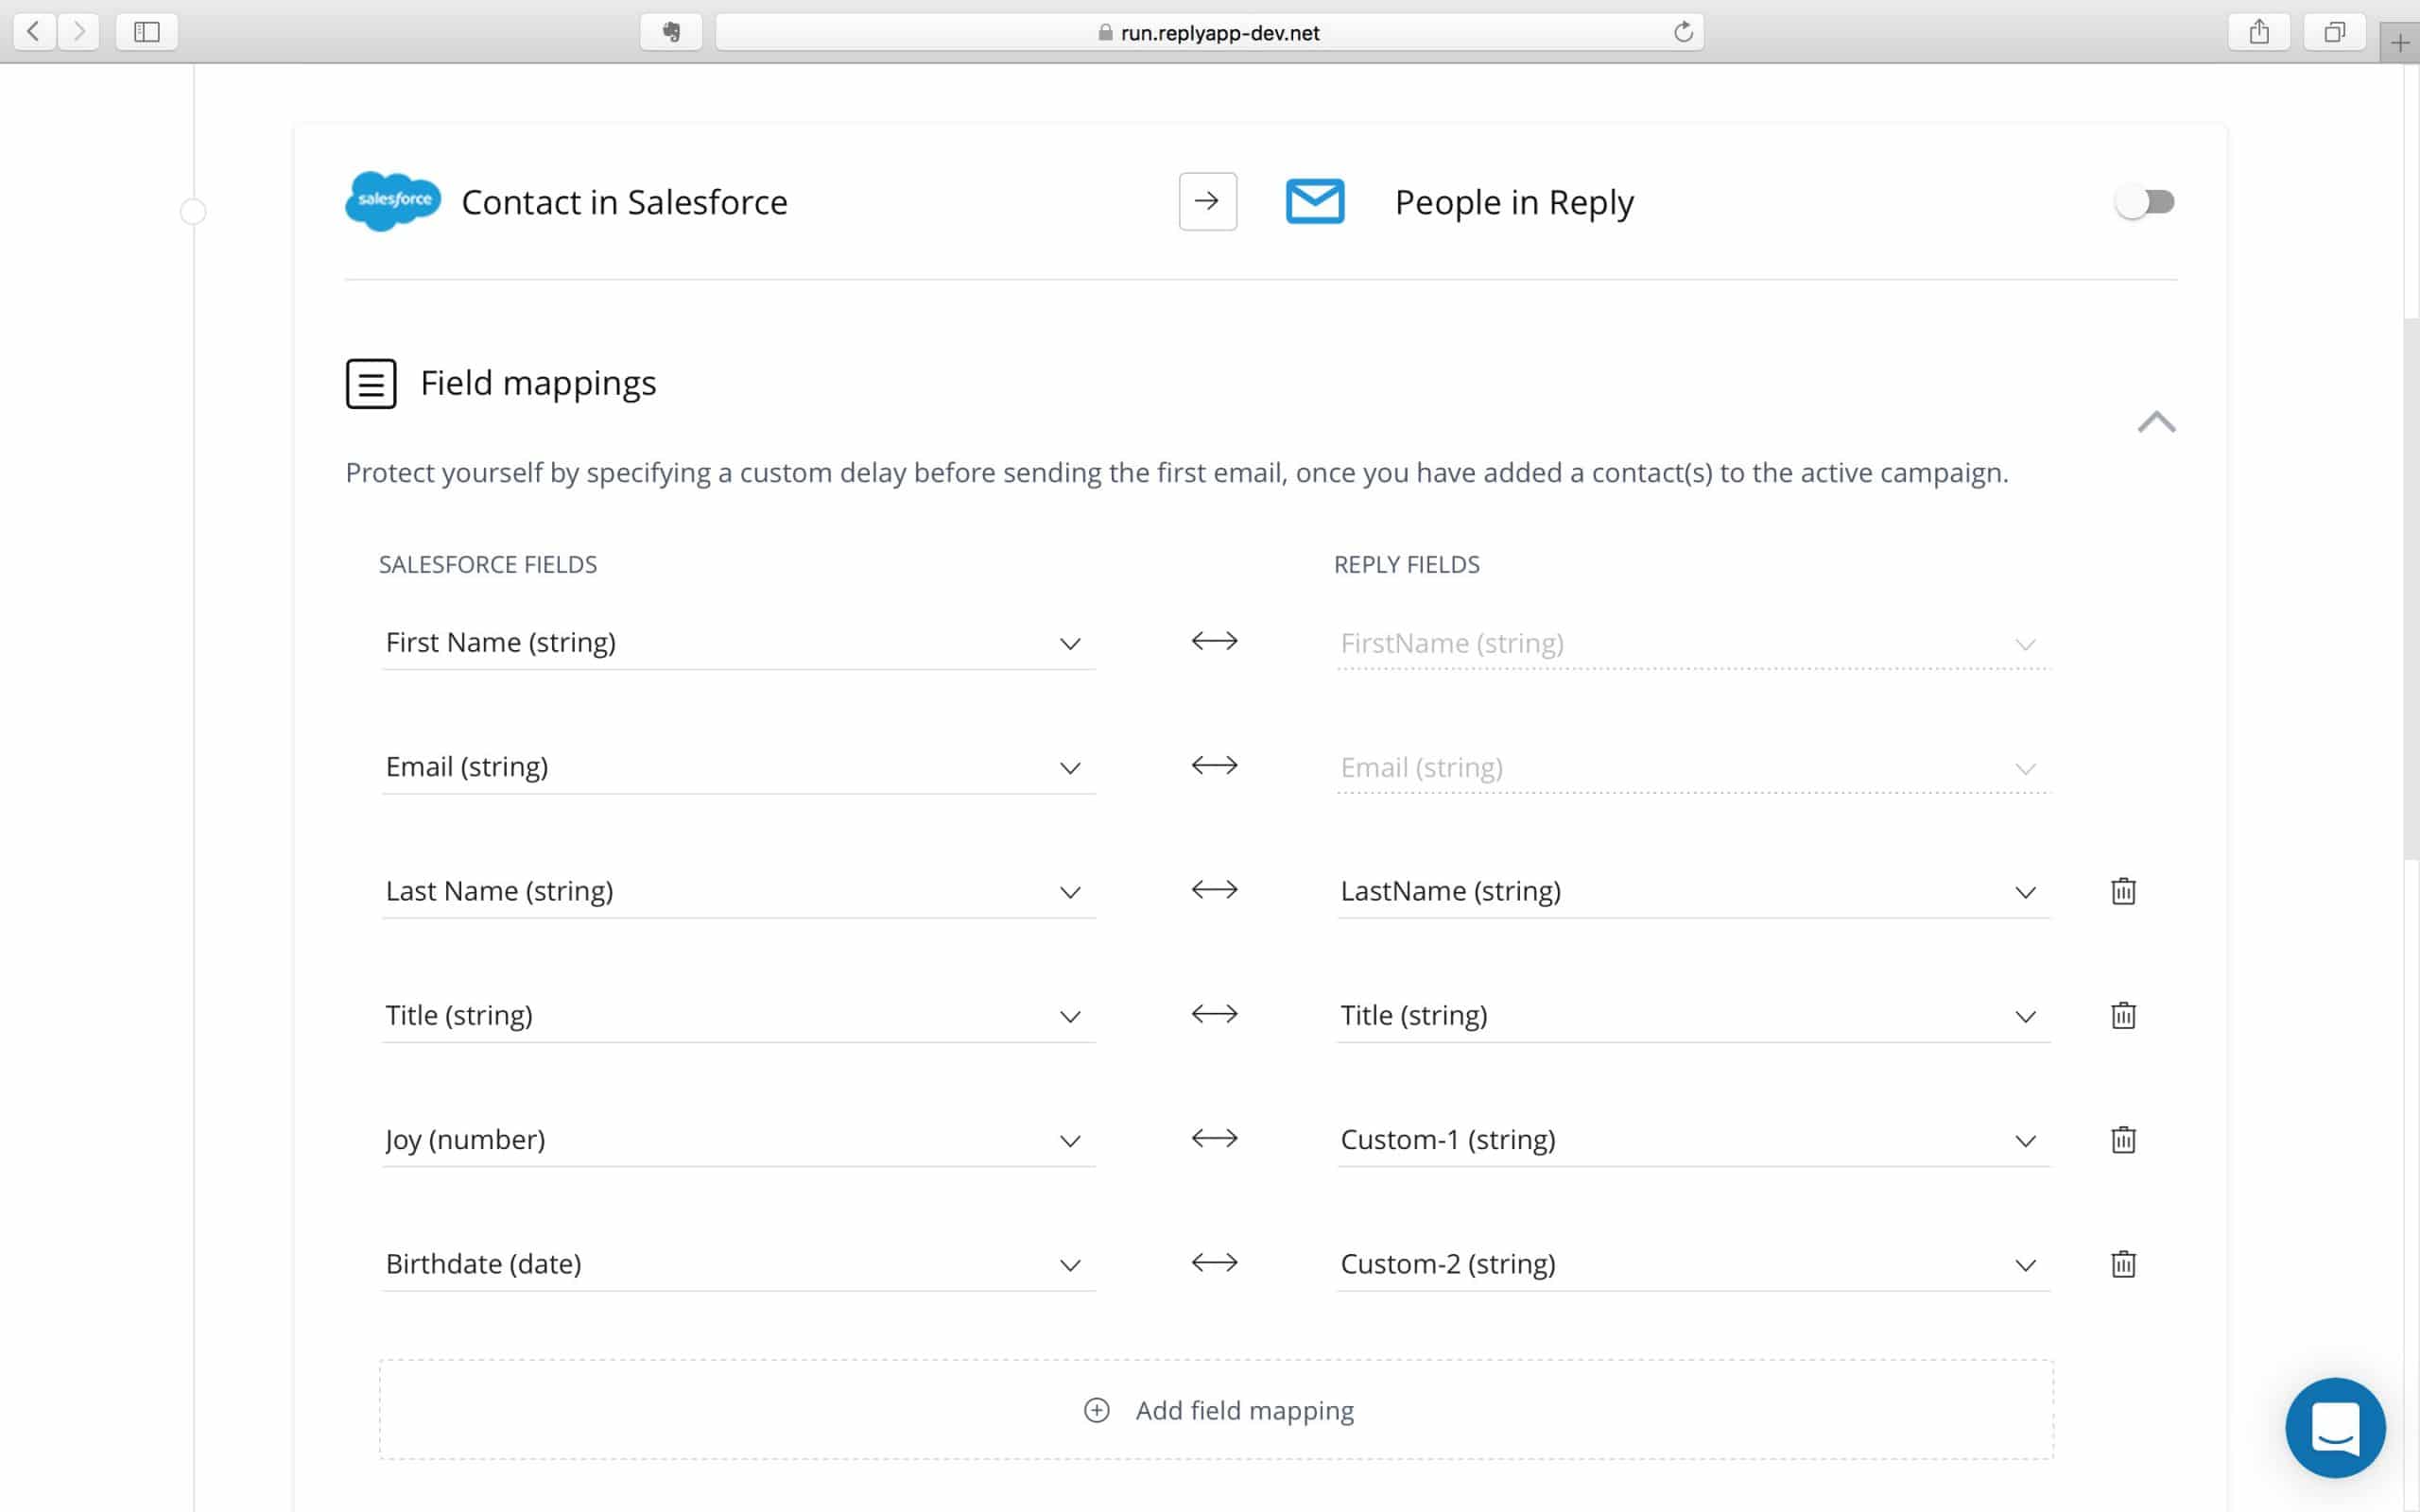
Integration Rules and Mapping Fields
Vital information is right at your fingertips to map fields, providing insight into how the integration works or where the prospects are being pulled from, and once you have everything properly tuned, all you need to do is just to activate it.
Our latest update changes all of that.
Filter Rules is clearly labeled and displays exactly what information will be pulled to and from CRM. You can create multiple rule sets, each drawing specific prospects based on intricate criteria you choose. Only looking to transfer the most recent contacts based on referrals? We can do that. Maybe you’re looking to reach out to prospects from certain latitudes? We can grab those for you as well!
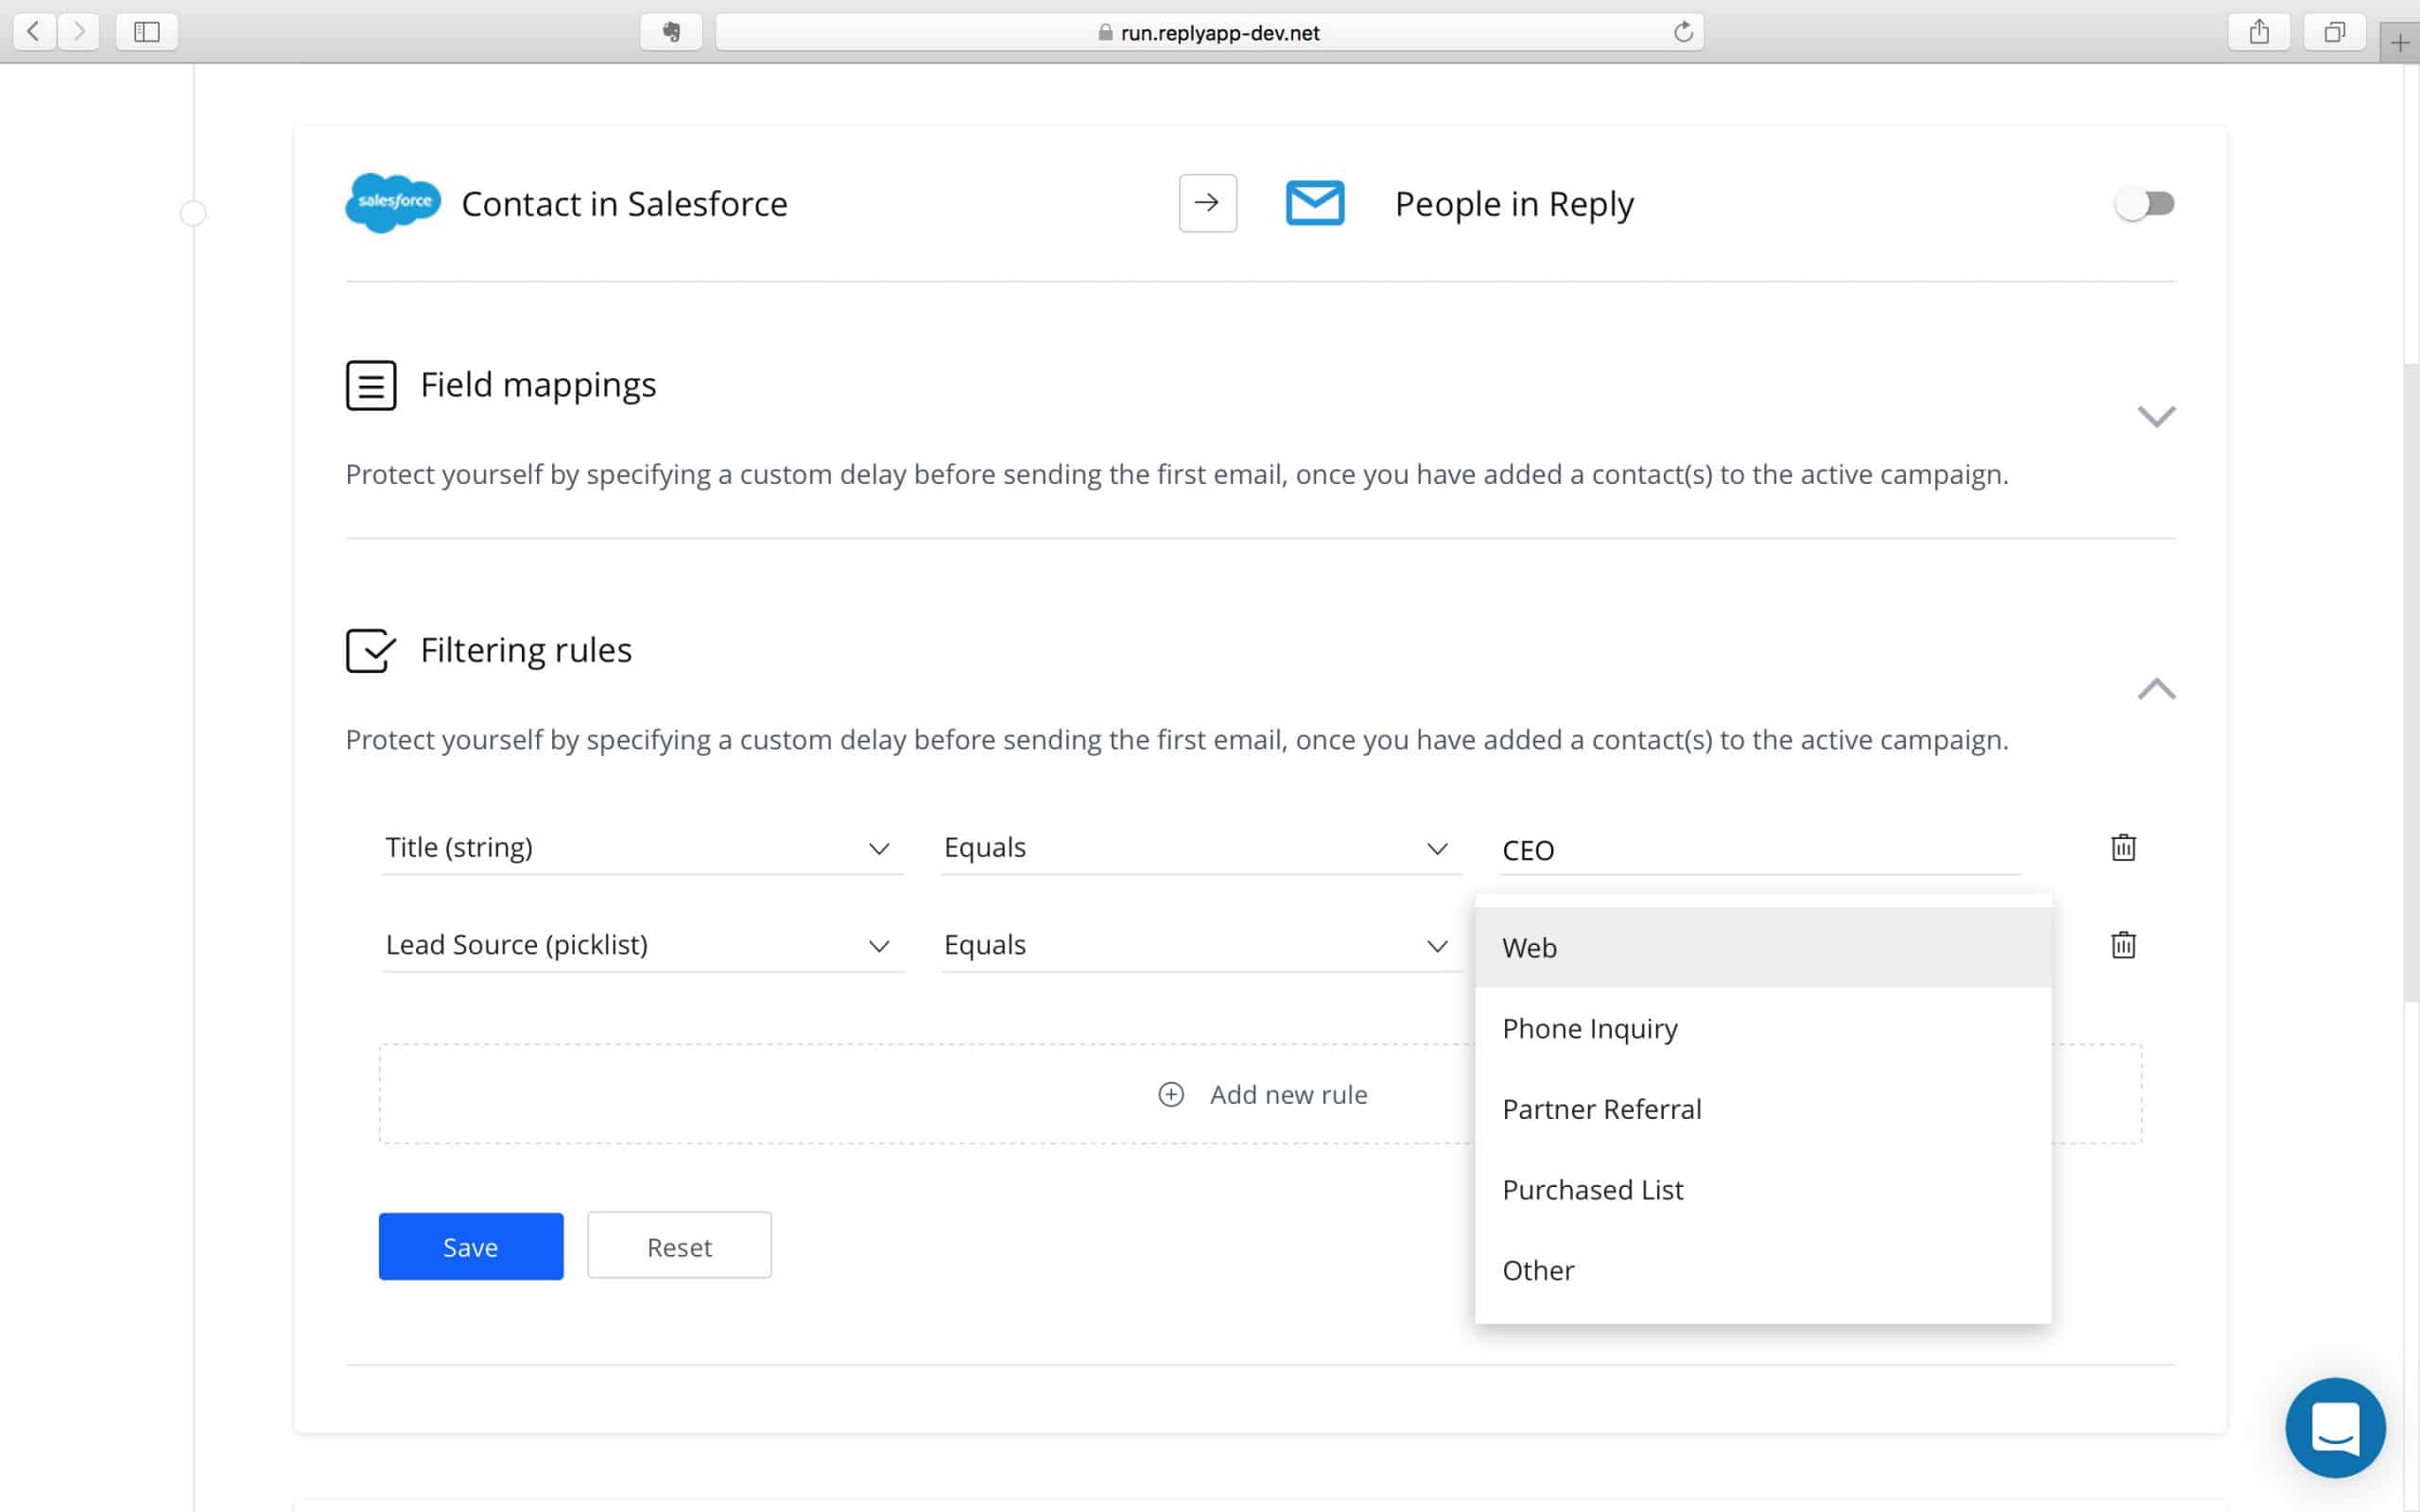
Our criteria pool will continue to grow with the product so you will never have to worry about leaving information behind again.
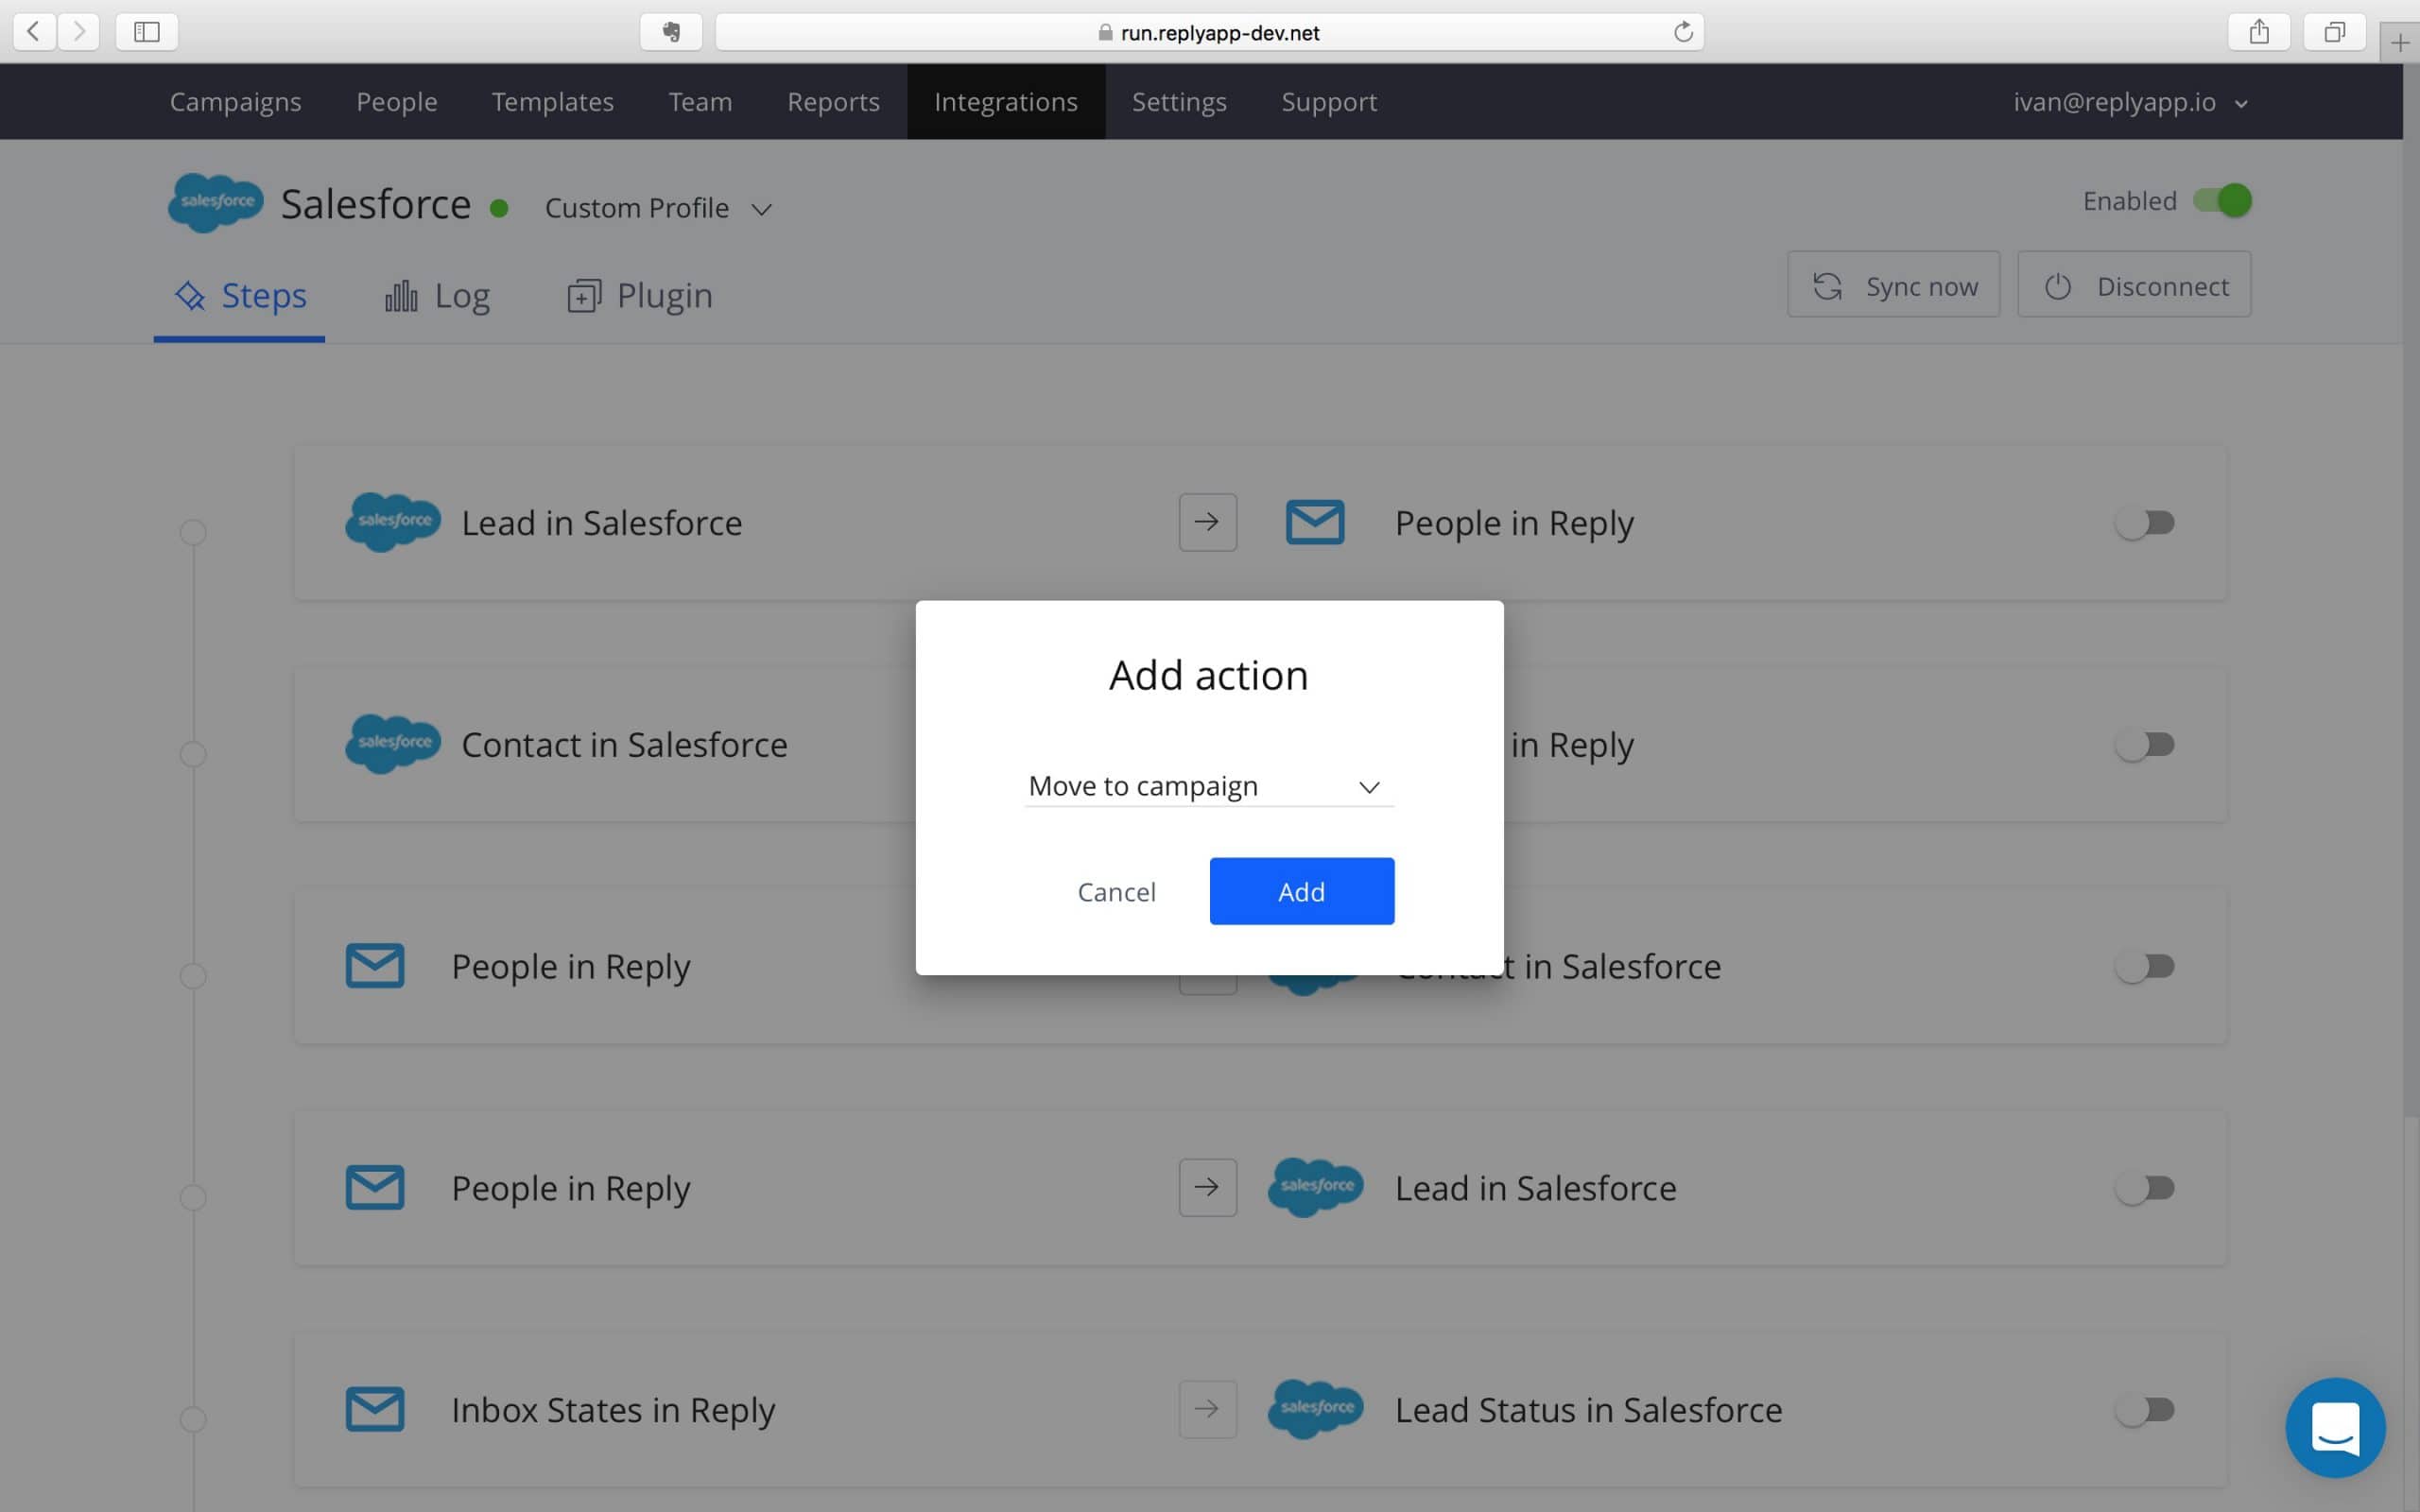
A Call to “Action”.
Along with our updated Step options, we now allow for infinitely more customization in the form of Actions. After selecting the type of connection you want, you can then specify where you would like the contacts to go. Now you can filter through your leads or contacts and automatically send each new group to the proper campaign.
So let’s talk about user cases.
Say you want to transfer over a certain group of leads from Salesforce into a Reply campaign. You would first create the step between the two platforms. Once the step is created, by clicking into it you will see options for Field Mappings and Filtering Rules (as discussed above).
For the sake of this example, we’ll say that we map first and last name as well as their job title and email address. Now, almost all of your leads will probably have all of these fields available.
In order to pick out a certain subset of them, we will apply the filters (this hypothetical case will see us filter by a specific title, CEO, and the lead must have been purchased from an online source).
With both the filtering rules and mapping fields set, we are almost finished with the step. All that is left now is to add a specific action (Move to Campaign). Once the integration step has been created the Action can be added via the small + button directly beneath the step.
The automation saves an incredible amount of time where the older integration still involved a lot of manual sifting through data and reorganization.
Better Visibility.
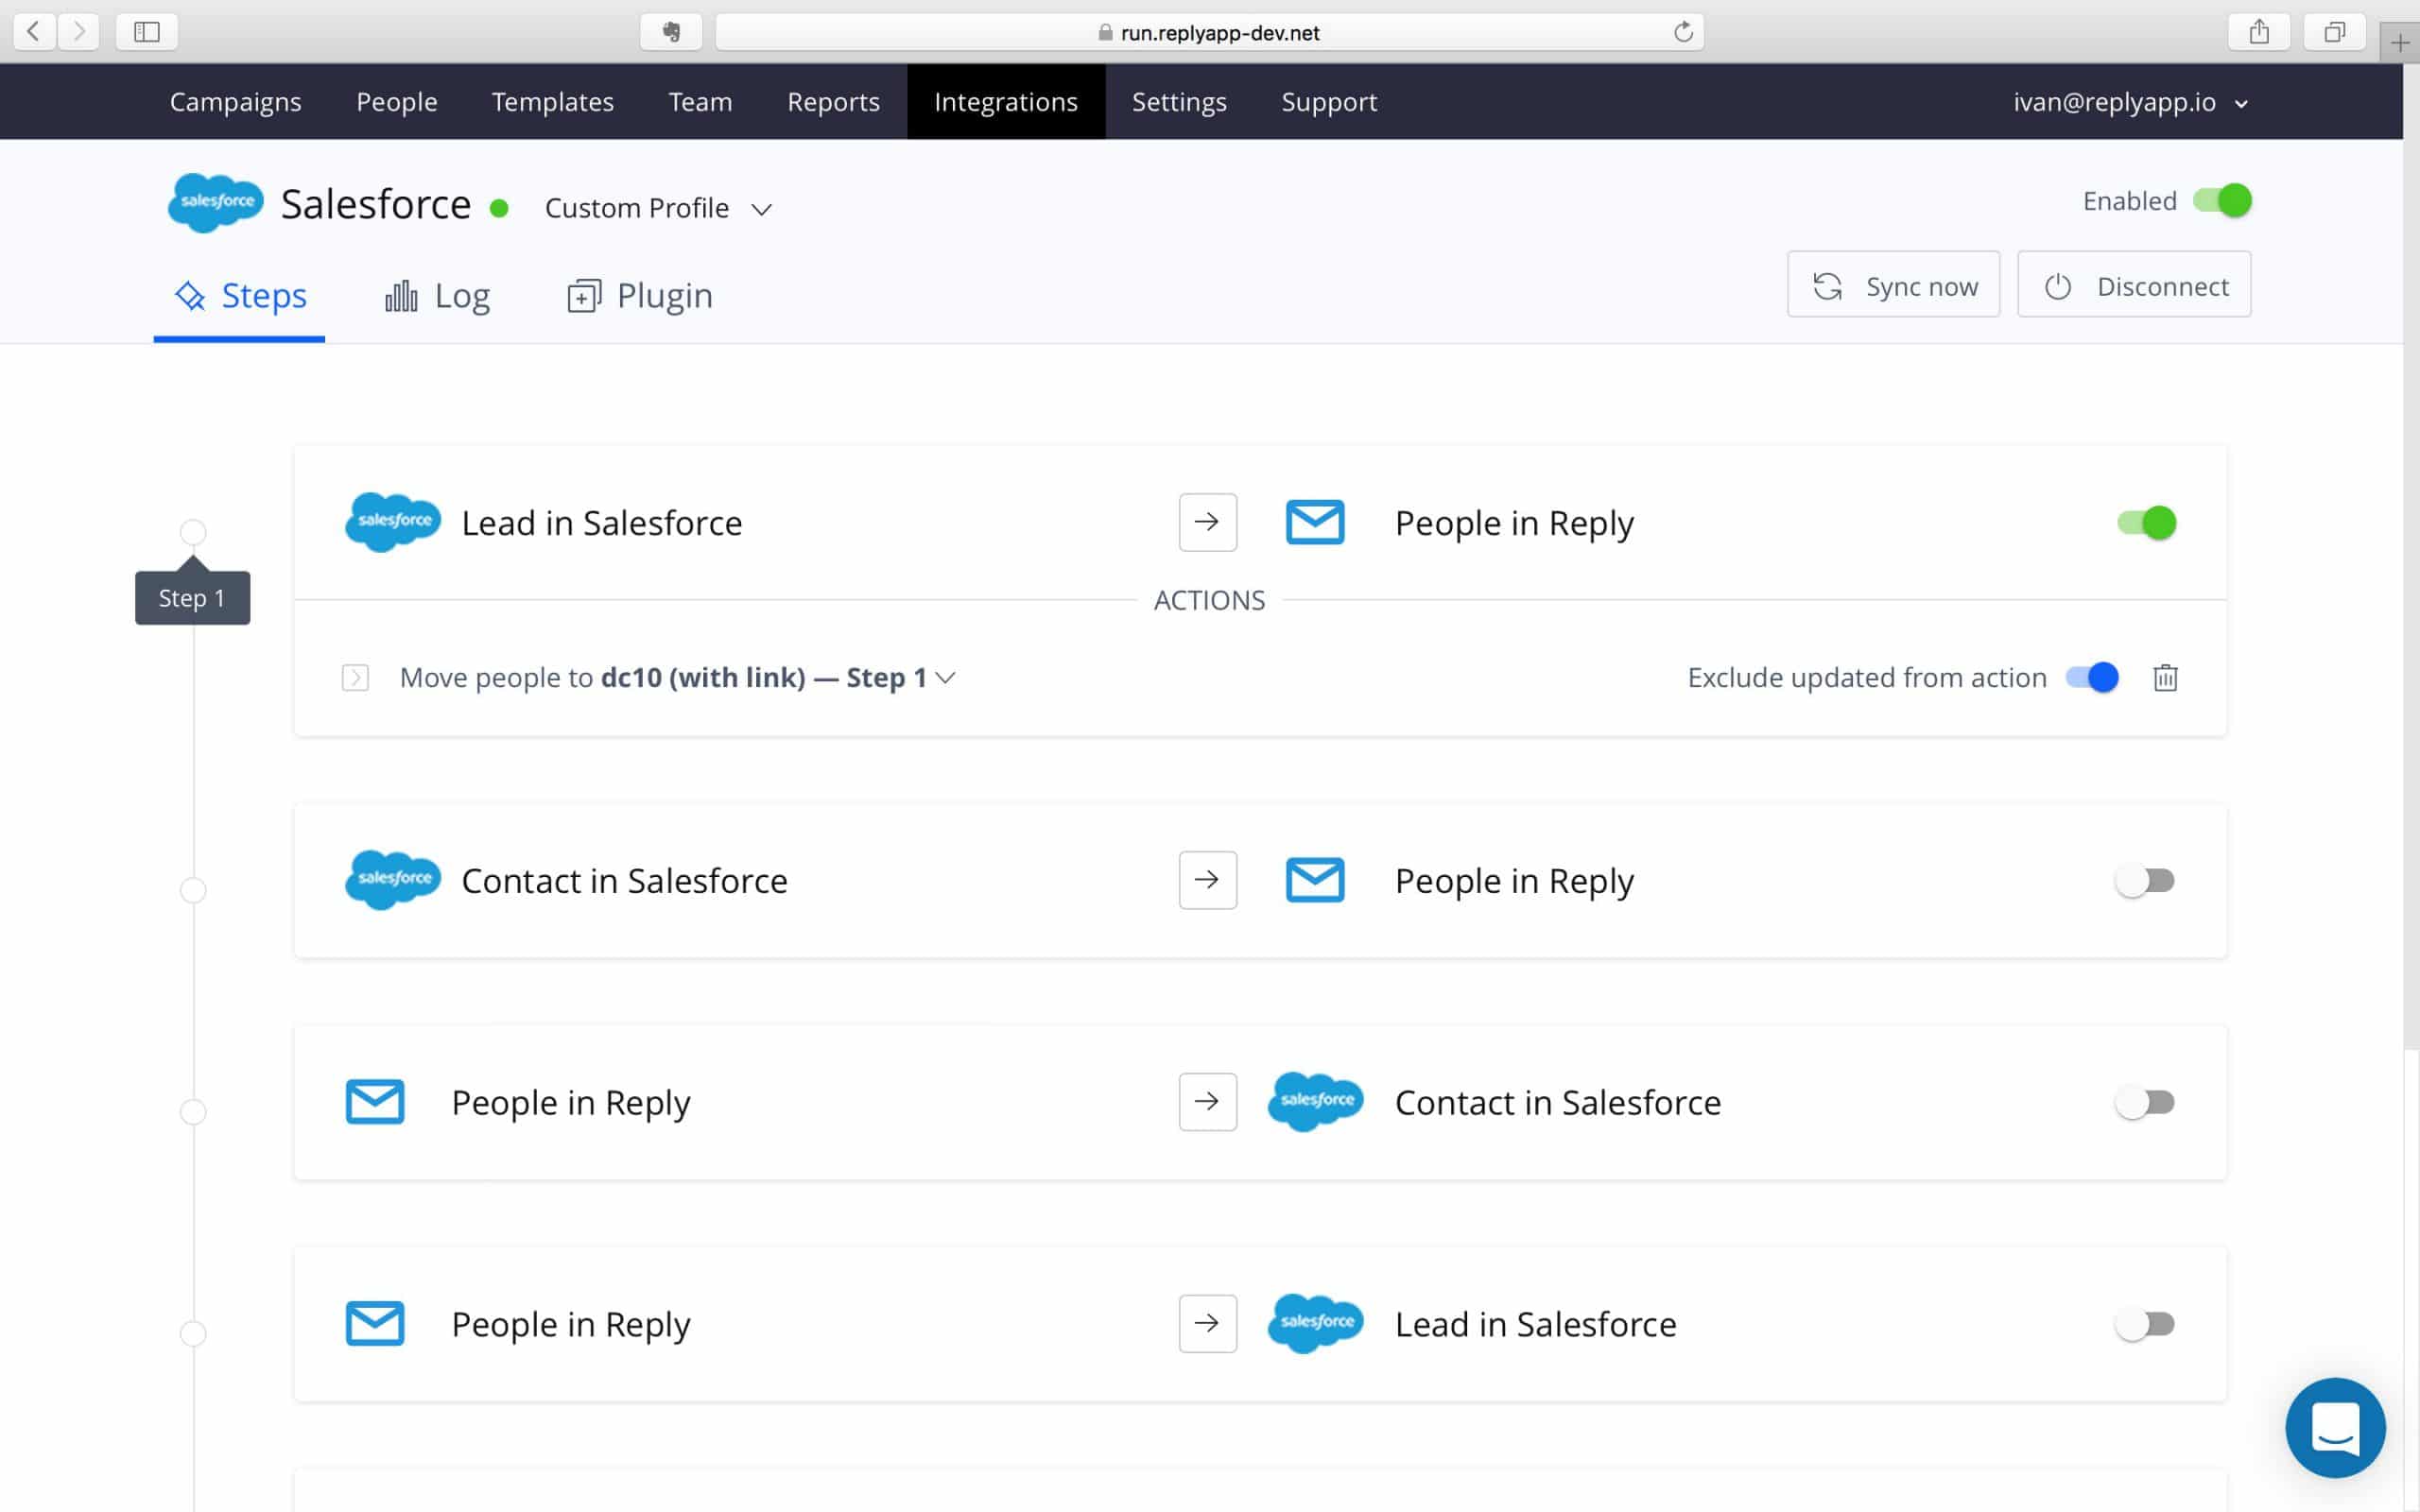
As previously mentioned, it’s not always easy to tell if the integration is up and running, even after pouring over field mappings and tinkering with all of the settings. We know make it plain as day by giving you a switch.
Just like our campaigns, green is go and red means no. You can toggle each rule set on and off whenever you’d like in order to add even further customization to who you bring over and when.
It’s a small adjustment, but one that will go along way in better understanding your workflow and assisting people new to the platform.
Multiple Profiles
With our new integrations suite comes user profiles. We allow 2 different profiles: Custom and Default.
The Default profile has a few pre-set rules that allow for more novice CRM users to quickly transfer over contacts and get to work.
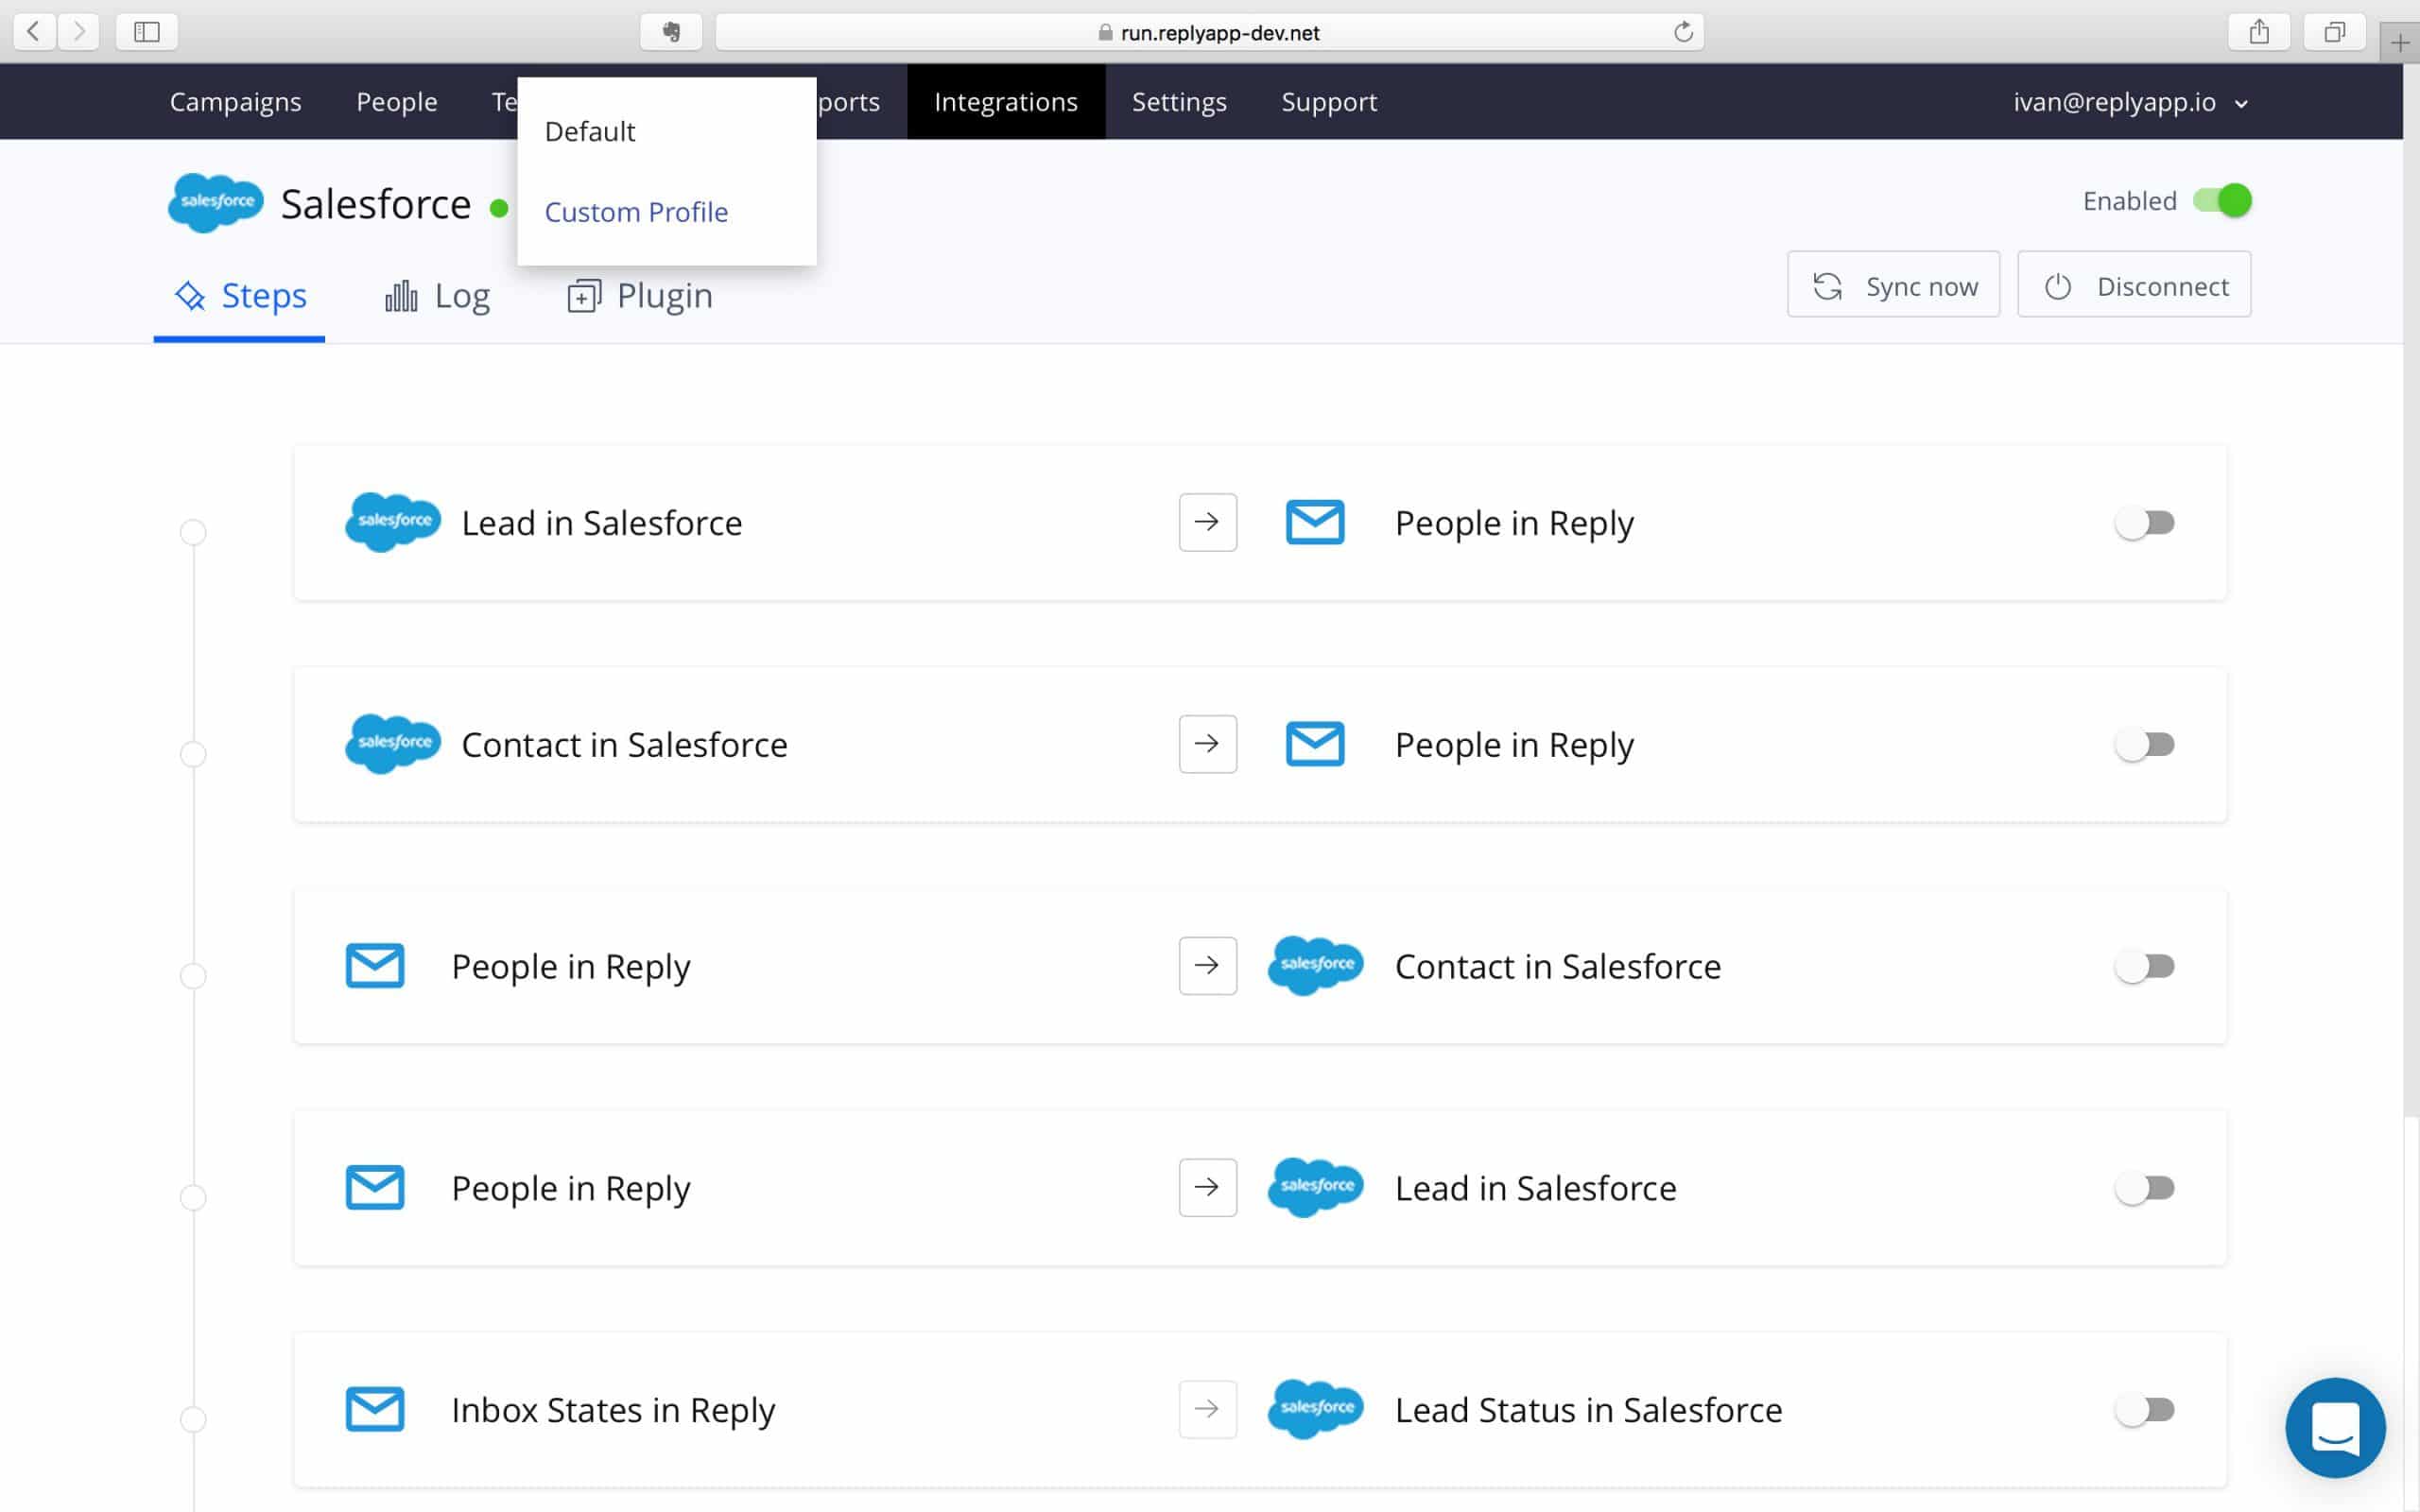
The Custom profile, on the other hand, is a lot more complex. If you aren’t getting enough out of the basic functionality you can create your own custom rule sets and add as many sync steps as you’d like. Living up to its name, the custom profile is 100 percent malleable. Users can add and take away from it as they like until they have the perfect sync process.
And More
We hope that this quick introduction to our newest integration is enough to get you interested. In addition to everything we have mentioned here, more features are on the way. We plan on doing a pass on all of our native integrations as well as introduce completely new ones in the near future.
If you are looking for more information or specifics in regards to this new update, hop into our live chats and request a demo. Our support team will be more than happy to set something up for you!


